|
Movie View
|   |

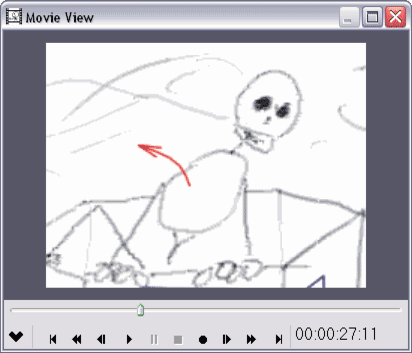
The Movie View lets you play your story in real time, as an animatic.
You can open the Movie View with the View > Movie View command, or with Go > Play, which also starts the movie playing from the current frame.
You can play the movie in real-time, pause, and move around by frame with the transport buttons at the bottom of the frame, which have their usual meanings.
You can drag the slider left and right to move quickly through the story. Any sound in the story "scrubs," or plays in short loops, as you drag.
The current time point is displayed in the lower right. You can go to a particular point in time by double-clicking on the time, editing it, and pressing the Tab key.
Recording frame timing
You can use the Movie view to record frame durations interactively. As you watch your movie play, you can tell Springboard when to transition between frames. Springboard will time your keystrokes and note down the duration of each frame and transition, so that when you play or export your movie again, the timing will match.
To record frame timing:
Your timing will be recorded and saved in the frame durations.
Transitions you record in this way will be "cuts" - the frames will not overlap.
Smooth frame transitions
You can also record smooth "fade" transitions between two frames, so two consecutive frames overlap in time.
To fade between two frames:
Hold down the Right Arrow key or Frame Forward button ![]() for the duration of the transition; let the key up when the transition should be complete.
for the duration of the transition; let the key up when the transition should be complete.
You must hold down the key or button for at least 0.3 seconds in order to record a fade transition. If you release it quickly, the transition will be recorded as a cut.
You can fine-tune both frame durations and frame overlap by editing the values directly for each frame in the Frame Properties dialog.
Advanced controls
The Show More button ![]() in the Movie View's tool bar reveals the advanced controls:
in the Movie View's tool bar reveals the advanced controls:
Recording Sound
To record narration along with frame timing, set up your microphone as described in Working with sound, and ensure the Record Sound button ![]() is down. Then follow the instructions above under Recording frame timing, while speaking into the microphone. When you stop recording, sound clips will be created and inserted into the Story Tree.
is down. Then follow the instructions above under Recording frame timing, while speaking into the microphone. When you stop recording, sound clips will be created and inserted into the Story Tree.
If you begin recording with a frame selected in the Story Tree, new sound clips will be attached to each frame played as you record. If you begin recording with a section selected in the Story Tree, a single sound clip will be attached to that section.
To record sound without changing existing frame timing, ensure the Record Sound button is down and the Record Timing button ![]() is up. Frames will play and transition at their normal rate, and your recorded sound will be placed in sound clips as above.
is up. Frames will play and transition at their normal rate, and your recorded sound will be placed in sound clips as above.
Existing sound clips play during recording if Record Timing is off. If Record Timing is on, sound clips that are attached to the story root are played normally; sound clips attached to frames are played when those frames are triggered, but will have their beginnings cut off due to the
If neither Record Timing nor Record Sound is on, the Record button ![]() is disabled.
is disabled.